

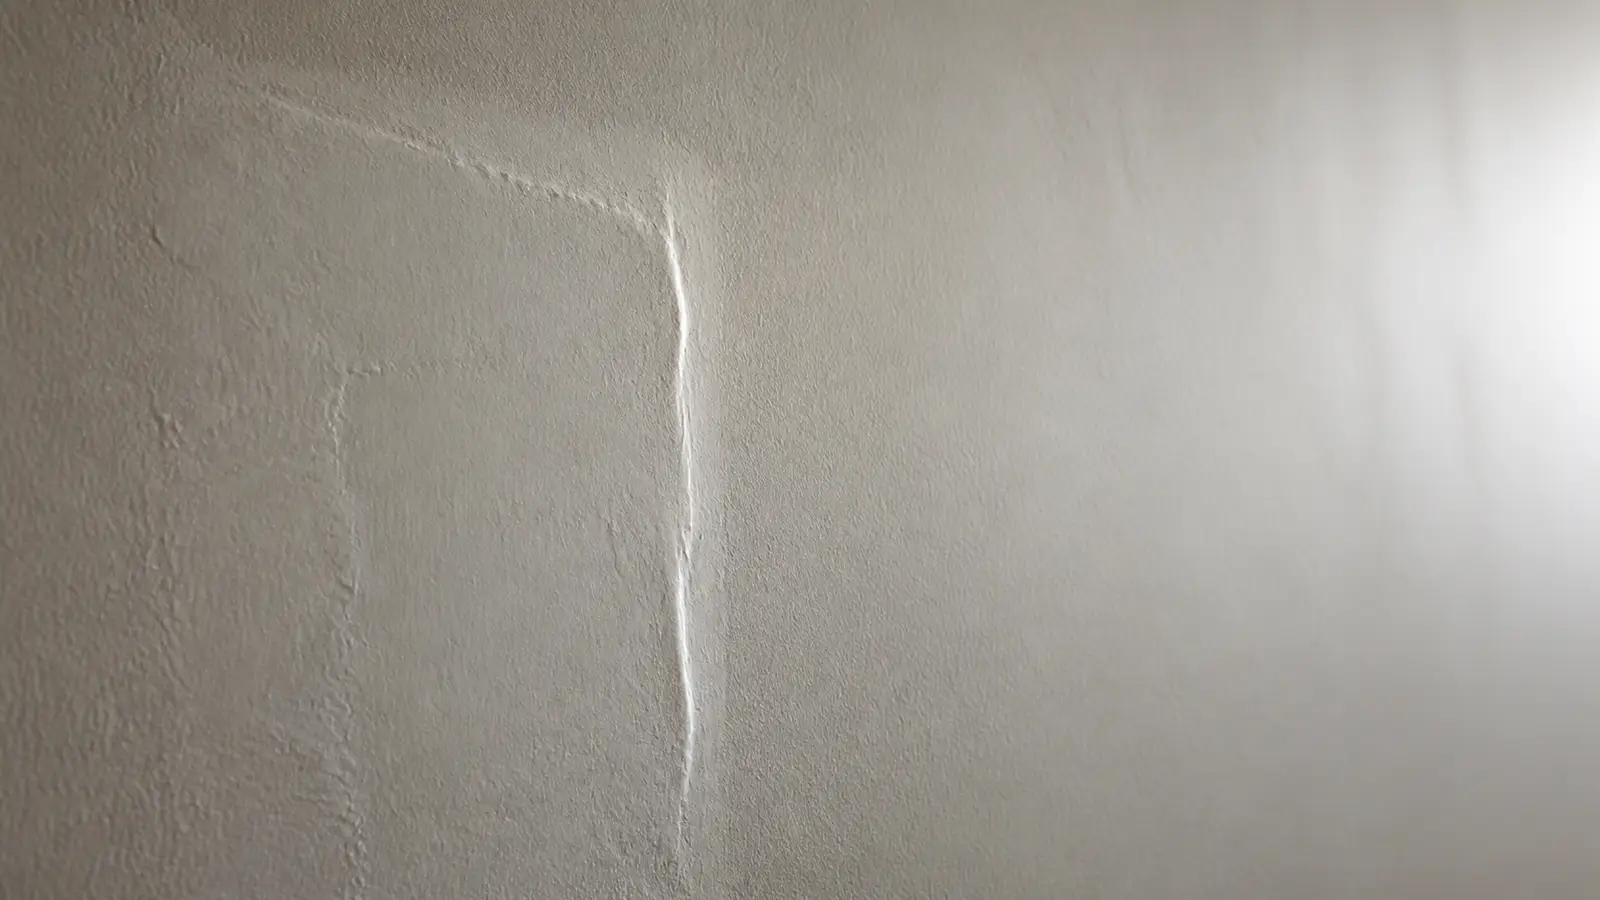
Drywall patches form noticeable, bulging "humps" because repair cuts are butt joints with no factory recessed edges to receive joint tape and compound. When an amateur uses thick fiberglass mesh tape and a small 6-inch putty knife, the mud sits 1/8" above the wall surface across a narrow 6-inch span, creating a steep crown that casts visible shadows under lighting. Professional drywall finishers use thin paper or structural composite tape bedded in low-shrinkage chemical hot mud, then feather the joint 14 to 18 inches outward using wide stainless curved skimming blades so the slope is less than 1/64" per foot—making the patch optically invisible.
The Bulging Patch Phenomenon: Why That 6-Inch Hole Looks Like a Mountain
We've all seen it: a homeowner patches a small hole in a hallway or living room. They buy a self-adhesive mesh patch kit from the hardware store, slap joint compound over it with a 4-inch or 6-inch putty knife, sand it until their arm is tired, and paint it.
From directly in front, it might pass a quick glance. But the moment you stand at the end of the hallway or look down the wall as natural light enters the room, the patch looks like a distinct, raised blister bulging out from the drywall.
Even if you sand it down until you hit the mesh tape, the bump remains.
Why does this happen? The answer comes down to drywall edge geometry, tool blade curvature, and optical feathering physics.
Factory Tapered Edges vs. Flat Butt Joints
To understand why patches create humps, you have to understand how drywall sheets are engineered:
| Edge Type | Physical Surface Profile | How Compound Behaves | Visual Result |
|---|---|---|---|
| Factory Tapered Edge | 2.5-inch wide, 1/16-inch deep recessed depression along sheet edges. | Tape and 3 coats of compound sit inside the recess. | Finished joint cures completely flush with surrounding board. |
| Cut Butt Joint / Patch Cut | No recess; drywall core is full 1/2" thickness right to the cut edge. | Tape and compound must sit on top of the wall plane. | Creates a natural 1/16" to 1/8" elevation that must be feathered wide. |
Because a drywall patch has no recessed trough to hide inside, the finisher's job is not to make the patch "flat"—it is to feather the crown so wide that the human eye and ambient light cannot detect the slope.
The "6-Inch Knife Trap": Why Narrow Tools Create Blisters
When an inexperienced DIYer or handyman works on a patch, they almost always use a 4-inch or 6-inch putty knife.
| Tool & Technique | Elevation & Span | Crown Slope Angle | Visual Shadowing Result |
|---|---|---|---|
| Amateur 6-Inch Putty Knife | 1/8" peak spread across only 6 inches | 15° to 30° steep slope | High-contrast shadow line visible across room; looks like a bulging blister. |
| Professional 16-Inch Skimming Blade | 1/16" peak feathered across 16 to 18 inches | < 1° ultra-gentle slope (<1/64" per ft) | Optically imperceptible; light glides smoothly across the wall with zero shadow. |
The 4 Secrets to Eliminating Patch Humps
At Solis Interiors, our master craftsmen follow strict mechanical rules to ensure every drywall patch is completely undetectable:
- Chamfering Cutout Edges (The 45-Degree Back-Bevel): Before taping a patch, we use a utility knife to cut a 45-degree bevel along the paper edge of both the wall cutout and the replacement patch insert. This creates a small V-groove that allows the joint compound to fill the core without pushing the tape above the surface.
- Low-Shrinkage Chemical-Setting "Hot Mud": We never use pre-mixed bucket mud for bedding patch tape. Pre-mixed mud dries by water evaporation and shrinks by up to 25%, causing dimples and cratering. We bed tape in chemical-setting compound (20- or 45-minute hot mud), which cures by chemical reaction with near-zero shrinkage.
- Progressive Wide-Blade Feathering (10", 12", 14", 16"): We feather each successive coat outward with wider flexible stainless-steel skimming blades, extending compound 8 to 10 inches past the previous layer until the edges dissolve to zero.
- Directional Grazing Light Inspection & Dustless Sanding: We inspect every patch under 500W directional inspection lamps held at a 15-degree angle to the wall. We sand with 220-grit micro-abrasives connected to commercial HEPA-filtered dust extraction systems, eliminating 99.9% of airborne dust while ensuring the feather edge is perfectly smooth.
2026 Patch Repair & Hump Correction Pricing in South Sound
Fixing failed DIY patches or repairing plumbing/electrical cutouts correctly requires skilled hand feathering and precise texture blending:
| Project Scope | 2026 South Sound Cost Range | What is Included in the Scope |
|---|---|---|
| Correcting 1-2 Bulging DIY Patches | $350 - $650 | Grinding down high humps, re-floating 16" wide with hot mud, HEPA sanding, texture match |
| New Plumbing / Electrical Cutout Patch (1-4 sq. ft.) | $350 - $650 | Timber backing, moisture-resistant insert, 45-deg bevel, 3-pass wide feathering, spray texture, primer |
| Large Hole / Ceiling Access Patch (4-16 sq. ft.) | $650 - $1,250 | Joist re-securing, board replacement, 16"-wide crown feathering, custom orange peel/knockdown blend |
| Full Accent Wall Skim & Flattening (Up to 150 sq. ft.) | $750 - $1,600 | Full-wall skim coating to eliminate multiple historical patch crowns and restore a monolithic plane |
Frequently Asked Questions (FAQ)
Can I just sand down a bulging patch until it's flat?
Usually not. Because the hump is caused by joint tape sitting on top of the drywall, sanding the hump flat will sand right through the joint compound into the mesh or paper tape. Once the tape is frayed or exposed, the patch loses its structural strength and the fiberglass fibers will show through your paint. The proper fix is to re-float the joint wide with a 14-to-16-inch knife.
Why do you prefer paper tape over fiberglass mesh tape?
Self-adhesive fiberglass mesh tape is thick and flexible, allowing slight wall movement to crack the joint unless bedded in heavy chemical hot mud. Professional paper tape (or ultra-thin structural composite tape) is significantly thinner and provides higher tensile strength across flat butt joints.
How do you blend the texture around a wide feathered patch?
We never spray texture in a concentrated cone directly over the repair. We spray the core of the patch to full density, then fan our commercial continuous-flow air compressor spray pattern 12 to 18 inches outward in overlapping sweeping arcs, gradually tapering droplet spacing until it dissolves into the original wall.
Authoritative Building Standards & References
- Association of the Wall and Ceiling Industry (AWCI): AWCI Technical Manual 12-B: Standard Practice for Surface Texture Application
- Gypsum Association (GA): GA-214: Recommended Levels of Finish for Gypsum Panel Products
- American Society for Testing and Materials (ASTM): ASTM C840: Standard Specification for Finishing Gypsum Board
Schedule a Walkthrough with Solis Interiors
Contact master finisher Jesus Solis for an on-site evaluation, expert substrate consulting, and itemized proposal across the South Sound.
- Direct Phone: (360) 350-8616
- Online Quote Request: Request Drywall Patching Estimate
- Service Areas: Lacey, Olympia, Tumwater, Tacoma, Lakewood, DuPont, Gig Harbor, Yelm, Centralia.